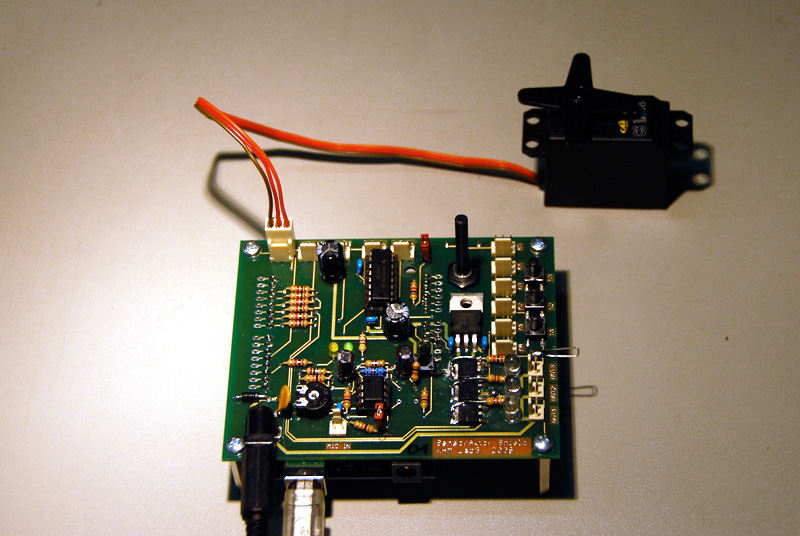
Servo controller
Basic example to control a servo motor using built-in poti of SensorAktor-Shield.
/* servo controller

 *
 * using poti to control servo
 *

 * SensorAktor Workshop
 * Lab3 2008
 * Kunsthochschule fuer Medien Koeln
 * Academy of Media Arts Cologne
 * http://interface.khm.de

 * pin mapping SensorAktor Shield
 * import SensorAktor.h to get already defined mapping
 *
 * analog inputs: analog0 = pin0, analog1 = pin1, analog2 = pin2,
 * analog3 = pin3, analog4 = pin4, analog5 = pin5
 * built-in poti: poti = pin5
 * amplified input: mic = pin0
 * switches: switch1 = pin1, switch2 = pin2, switch3 = pin3
 * leds: led1 = pin3, led2 = pin5, led3 = pin6
 * power outs: out1 = pin3, out2 = pin5, out3 = pin6
 * motor outs: motor1_1 = pin8, motor1_2 = pin13, motor2_1 = pin11, motor2_2 = pin12
 * motor pwms: pwmMotor1 = pin10, pwmMotor2 = pin9
 * servo outs: servo1 = pin2, servo2 = pin4, servo3 = pin7

 */

// import sensor aktor library for pin mapping
#include <SensorAktor.h>

// import servo library
#include <SoftwareServo.h>

// servo
SoftwareServo myServo;

// poti value
int potiValue = 0;

// this block is executed one time when programm starts
void setup(){

  // set pin modes
  pinMode(servo1,OUTPUT);

  // attaches the servo on the servo pin
  myServo.attach(servo1);

}

// this block is executed in a loop after setup is called one time
void loop(){

  // read poti (value is between 0 and 1023)
  potiValue = analogRead(poti);
  // scale sensor value to use it with the verso (value between 0 and 179)
  potiValue = map(potiValue, 0 , 1023, 0, 179);

  // sets the servo position according to the scaled sensor value
  myServo.write(potiValue);

  // refresh always needed to drive servo
  SoftwareServo::refresh();

}
To control the servo the Software Servo library is used:
http://www.arduino.cc/playground/ComponentLib/Servo
There already comes another servo library with the Arduino Environment, but the Software Servo Library can drive servos on all of your pins simultaneously. Unfortunately when using the orginal Software Servo Library there is a conflict with the already included servo library. Therefore download the Software Servo library from the link provided on the bottom of this page.
To use the library include it in the header of your code and define a variable for the servo.
// import servo library
#include <SoftwareServo.h>

// servo
SoftwareServo myServo;
Attach the servo to the servo pin of the SenorAktor-Shield.
// attaches the servo on the servo pin
myServo.attach(servo1);
To set the position of the servo use the write() function and do not forget to make a refresh.
// sets the servo position according to the scaled sensor value
myServo.write(potiValue);

// refresh always needed to drive servo
SoftwareServo::refresh();
Files needed
Since Arduino 0015 there are some problems with the old “SensorAktor.h” file.
Use this one instead.


