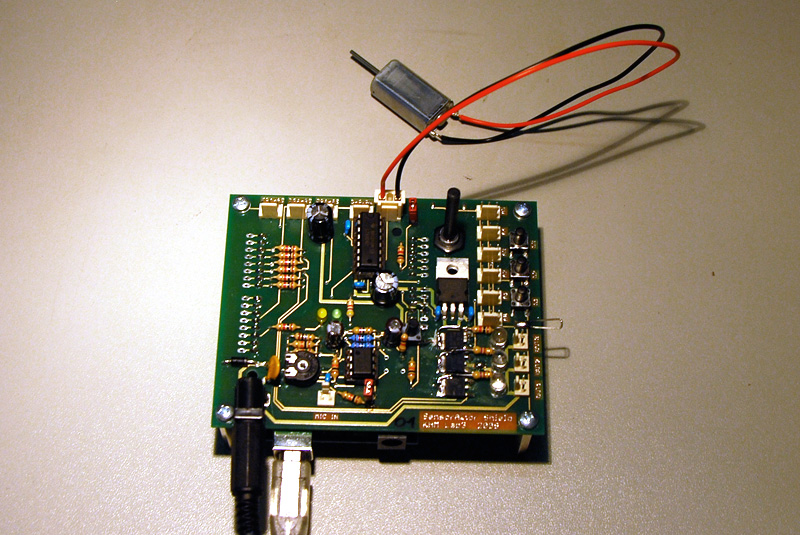
Simple DC motor controller
Basic example of a simple DC motor controller using the built-in L293 chip of the SensorAktor-Shield.
/* simple motor controller

 *
 * control speed of a motor
 *

 * SensorAktor Workshop
 * Lab3 2008
 * Kunsthochschule fuer Medien Koeln
 * Academy of Media Arts Cologne
 * http://interface.khm.de

 * pin mapping SensorAktor Shield
 * import SensorAktor.h to get already defined mapping
 *
 * analog inputs: analog0 = pin0, analog1 = pin1, analog2 = pin2,
 * analog3 = pin3, analog4 = pin4, analog5 = pin5
 * built-in poti: poti = pin5
 * amplified input: mic = pin0
 * switches: switch1 = pin1, switch2 = pin2, switch3 = pin3
 * leds: led1 = pin3, led2 = pin5, led3 = pin6
 * power outs: out1 = pin3, out2 = pin5, out3 = pin6
 * motor outs: motor1_1 = pin8, motor1_2 = pin13, motor2_1 = pin11, motor2_2 = pin12
 * motor pwms: pwmMotor1 = pin10, pwmMotor2 = pin9
 * servo outs: servo1 = pin2, servo2 = pin4, servo3 = pin7

 */

// import sensor aktor library for pin mapping
#include <SensorAktor.h>

// import motor library
#include <MotorL293.h>
// create instance for motor
MotorL293 myMotor;

// poti value
int potiValue = 0;

// this block is executed one time when programm starts
void setup(){

  // attach pins to motor (motor pin1, motor pin2, pwm pin motor)
  myMotor.attach(motor1_1, motor1_2, pwmMotor1);

  // set direction (0=left, 1=right)
  myMotor.setDirection(0);

}

// this block is executed in a loop after setup is called one time
void loop(){

  // read poti (value between 0 and 1023)
  potiValue = analogRead(poti);
  // scale poti value to use it with setPower (value between 0 and 254)
  potiValue = map(potiValue, 0 , 1023, 0, 254);

  // set speed of motor using poti value (value between 0 and 254)
  myMotor.setPower(potiValue);

}
We developed a simple library to control a DC motor using the L293 chip. Include it in the header of your code and define a variable for the motor.
// import motor library
#include <MotorL293.h>
// create instance for motor
MotorL293 myMotor;
Then attach the pins to the motor and set the direction.
void setup(){

  // attach pins to motor (motor pin1, motor pin2, pwm pin motor)
  myMotor.attach(motor2_1, motor2_2, pwmMotor2);

  // set direction (0=left, 1=right)
  myMotor.setDirection(0);

}
To drive the motor use the setPower() function.
// set speed of motor using poti value (value between 0 and 254)
myMotor.setPower(potiValue);
You can have a view at the “MotorL293.cpp” file to get an idea, how the motor is controlled. We use the PWM to set the power of the motor. To get a better result the PWM frequency is increased by setting its prescaler to 1.
// Timer 1 prescaler to 1
cbi(TCCR1B, CS12);
cbi(TCCR1B, CS11);
sbi(TCCR1B, CS10);
The direction of the motor is set by switching motor pin1 and motor pin2 polar.
// set direction
void MotorL293::setDirection(int direction){
	// turn left
	if(direction == 0){
		digitalWrite(motorPin1,HIGH);
		digitalWrite(motorPin2,LOW);
	}else{
		digitalWrite(motorPin1,LOW);
		digitalWrite(motorPin2,HIGH);
	}
}
Files needed
Since Arduino 0015 there are some problems with the old “SensorAktor.h” file.
Use this one instead.


